Working with hydraulic cylinders needs you to be very careful. You can get hurt if you do not follow the right steps. Many bad accidents have happened from mistakes or broken equipment, as shown in the table below.
|
Year |
Incident Description |
|---|---|
|
1963 |
Brazil aerial tram disaster due to hydraulic failure. |
|
1981 |
Kansas City Hyatt Regency walkway collapse (hydraulic jack malfunction). |
|
1995 |
Seoul department store collapse linked to hydraulic cylinder misuse. |
|
2001 |
Osaka amusement ride accident, Japan (hydraulic brake failure). |
|
2007 |
Shanghai container crane hydraulic cylinder breakdown. |
|
2008 |
Sichuan earthquake rescue crane hydraulic failure incidents. |
|
2010 |
Chile mining rescue drill rig hydraulic malfunction. |
|
2013 |
Bangladesh garment factory collapse worsened by hydraulic lift failure. |
|
2015 |
Mecca construction crane accident involving faulty hydraulics. |
|
2017 |
German steel plant press cylinder burst. |
|
2020 |
Turkey shipyard crane hydraulic rupture. |
|
2022 |
Houston chemical plant valve actuator hydraulic failure. |
You must wear the right safety gear and look for leaks. This helps keep the system safe and working well. Always read all the steps before you start.
Tools and Safety Gear for Hydraulic Cylinders
Essential Tools List
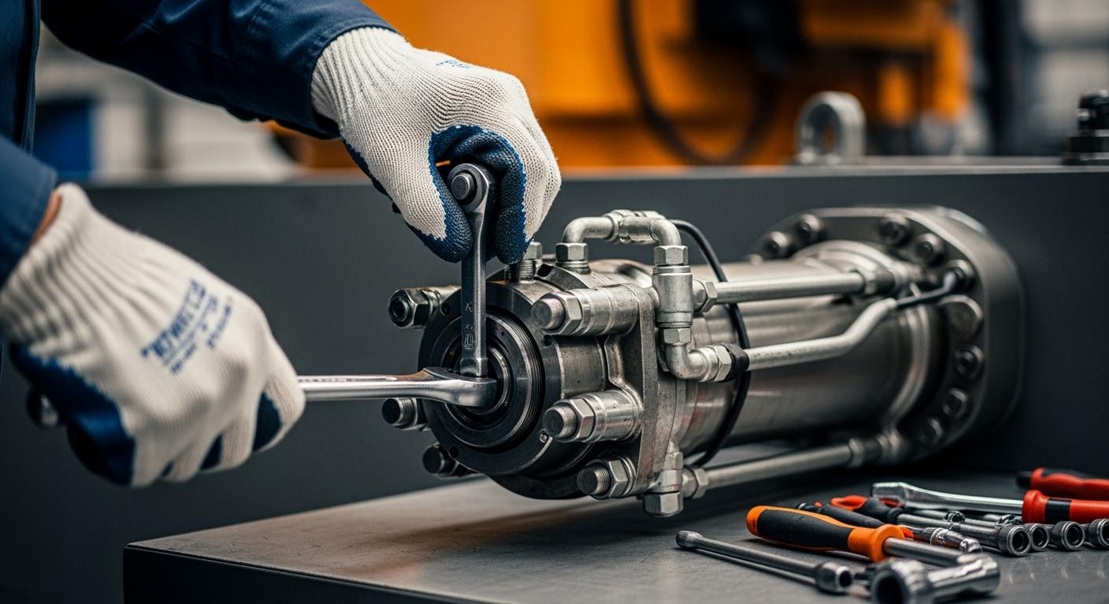
You need the right tools to remove and install hydraulic cylinders safely. Using proper tools helps you avoid damage and makes your work easier. Double acting hydraulic cylinders play a big role in many machines. If you use the correct tools, you can prevent costly repairs and keep your equipment running well.
Here are some industry-recommended tools you should have on hand:
-
Adjustable face-pin spanner wrenches
-
Adjustable head-pin spanner wrenches
-
Adjustable head-hook spanner wrenches
-
Drive gland nut wrenches (1 to 6 inches)
-
Four-piece U-seal installer tools (small to extra large)
-
Angle tip lock ring pliers
-
Four pick tools for seals
-
Smooth type piston ring compressor (2 to 5 inches)
-
Small cylinder hone (1 1/4 to 3 1/2 inches)
Tip: Always check your tools for wear or damage before you start. Worn tools can slip and cause injury.
Safety Equipment Checklist
Wearing the right safety gear protects you from injuries. Hydraulic fluid can spray out under high pressure. You must shield your hands, eyes, and skin.
|
PPE Item |
Purpose |
|---|---|
|
High-pressure fluid-resistant gloves |
Protect hands from potential fluid leaks |
|
Face shields or goggles |
Safeguard eyes from high-pressure sprays or flying debris |
|
Long-sleeve shirts and pants |
Prevent fluid from coming into direct contact with skin |
Note: Never skip safety gear. Even a small leak can cause serious harm.
Preparation and Cleaning Tips
Start by cleaning the area around the cylinder. Dirt and debris can get inside the system and cause damage. Use a clean rag to wipe down the cylinder and fittings. Make sure the work area stays dry and free of oil spills. Lay out your tools and safety gear before you begin. This helps you work faster and keeps you organized.
Reminder: A clean workspace helps you spot leaks and problems early. Always keep cleaning supplies nearby.
Remove Hydraulic Cylinders

Depressurize and Secure Equipment
You must make sure the equipment is safe before you start. High pressure hydraulic cylinders can keep high pressure inside, even when off. You need to do these steps to stay safe:
-
Take out all pressure from the hydraulic system. Lock out the pressure first. Even small hydraulic cylinders can hold a lot of PSI. Always check that all pressure is gone before you go on.
-
Make sure everyone has the right training. This helps stop accidents from happening.
-
Follow the instructions from the manufacturer. These steps help you avoid mistakes.
-
Use the correct tools for the job. Special tools keep you safe and protect the equipment.
-
Make the machine steady and safe. Use latches or blocks to hold it still.
-
Lower any loads onto mechanical locks. This takes pressure off the system.
-
Turn off the hydraulic pump and close the shut-off valve. This stops fluid from moving while you work.
-
Disconnect all energy sources. Get rid of any stored energy so the machine does not start by accident.
Tip: Always check again that the system has no pressure before you touch any hydraulic cylinders.
Disconnect and Plug Hydraulic Lines
After you make the equipment safe, you need to disconnect the hydraulic lines. This step helps stop leaks and keeps dirt out. Do these steps:
-
Turn off and depressurize the system. Make sure the power is off and pressure is gone. Use gauges to check for leftover pressure.
-
Clean around the coupler. Wipe away dirt or fluid. This keeps the inside clean.
-
Unlock the coupler. Release it based on its type. Make sure no pressure is left.
-
Cap and seal the ends right away. Put dust caps and plugs on both ends to stop dirt from getting in.
You can use different plugs or caps for hydraulic ports. The table below shows some common types and what they are used for:
|
Material |
Characteristics |
Common Applications |
|---|---|---|
|
Rubber |
Flexible, strong, handles high pressure |
Automotive brake lines, industrial machines |
|
Plastic |
Light, easy to use, does not rust |
Low-pressure systems, maintenance jobs |
|
Steel |
Strong, lasts long, handles high pressure |
Heavy-duty machines, hydraulic presses |
|
Brass |
Does not rust, handles high pressure |
Marine systems, plumbing, HVAC |
|
Aluminum |
Light, easy to use, does not rust |
Low-pressure systems, maintenance jobs |
Note: Always plug open ports right after you disconnect a line. This stops leaks and keeps dirt out.
Remove Cylinder and Drain Fluid
Now you can take out the hydraulic cylinder. Be careful and drain the fluid to stop spills. Here is what you do:
-
Make sure all hydraulic cylinders are closed. This leaves less oil inside.
-
Find the drain ports. Start with the main reservoir to drain faster.
-
Take out any return-line filters. This lets more fluid drain from the return lines.
-
Put a container under the hydraulic cylinder. This catches any fluid left inside.
-
Let the hydraulic fluid drain all the way. Wait until no more fluid comes out.
Safety Alert: Hydraulic cylinders can be heavy and hard to move. Use lifting tools or ask for help if you need it. Hold the cylinder with blocks or straps so it does not fall or roll.
When you change hydraulic cylinders, always clean the unit before you take it out. Plug all ports to stop leaks. Drain all fluid before you move the cylinder. These steps keep you safe and help the system work well.
Install Hydraulic Cylinders
Inspect and Prepare New Cylinder
Before you install the new cylinder, you need to check everything carefully. Safety comes first. You must wear gloves, goggles, and steel-toed boots. Look at the area where you will work. Make sure it is clean and safe. You should clean the hydraulic system and check the fluid level. Look at the new hydraulic cylinder for any damage or defects. Make sure it is the right size and has the correct mounting points. Secure the machine so it does not move while you work.
Here is a simple checklist to help you prepare the new cylinder:
-
Put on your safety gear.
-
Clean the work area and remove any debris.
-
Check the hydraulic fluid level and quality.
-
Inspect the new hydraulic cylinder for cracks, dents, or missing parts.
-
Confirm the cylinder matches the machine’s requirements.
-
Lock the machine in place to prevent movement.
Tip: Always double-check the mounting points and seals before you begin. This helps prevent leaks and future problems.
Position and Secure Cylinder
You need to position the new heavy duty hydraulic cylinder with care. Sometimes, the cylinder is heavy or hard to reach. You can use a cable winch to help move and extend the cylinder into place. Make sure the winch can handle the weight. Check the cable for strength and look for an emergency shut-off switch. Always use solid support under the cylinder and crib your load for safety.
-
Use only 80% of the winch’s rated load and stroke for stability.
-
Always use a saddle to protect the plunger and spread the load.
-
Place the cylinder on a flat, clean surface.
-
Use a pressure gauge to monitor levels.
When you position the cylinder, alignment is very important. If the cylinder is not straight, it can wear out quickly or break. You should measure and align the mounting brackets on both ends. Make sure they are parallel and level. Fasten the brackets with bolts or pins. Prepare the mounting surface so it is smooth and clean. Use a level or laser device to align the cylinder with the load and hydraulic system.
"If a slight misalignment cannot be avoided then the use of a spherical rod eye attachment may be required to compensate. Side loads can be caused by bent or twisted structures, which result in the pivot points of the cylinder no longer being on a parallel plane."
Proper alignment helps prevent stress and damage. You should also check the ports and hoses to make sure they do not twist or kink.
Reconnect Lines and Refill Fluid
After you install the new cylinder, you need to reconnect the hydraulic lines and fill with hydraulic fluid. Replace all the lines and test for leaks around the new seals. Make sure the fluid level is correct after refilling.
|
Step |
Description |
|---|---|
|
1 |
Replace all hydraulic lines |
|
2 |
Test for leaks around new seals |
|
3 |
Ensure proper fluid levels after refilling |
You should tighten all connections and check for drips. Watch the pressure gauge as you refill the system. If you see any leaks, stop and fix them before you continue.
Note: Always use clean hydraulic fluid. Dirty fluid can damage the new hydraulic cylinder and cause problems in the system.
You have now finished the main steps to install hydraulic cylinders. Careful inspection, proper alignment, and secure mounting help your equipment work safely and last longer.
Replace Hydraulic Cylinder Seals and Components
Remove and Clean Old Seals
You have to take out old seals before adding new ones. Bad seals can make leaks and hurt how the machine works. Watch for these signs when you check your hydraulic cylinder:
-
Leaks: You might see fluid puddles near the base.
-
Lower performance: The machine may not work as well.
-
Strange sounds: Grinding or knocking can mean a problem.
-
Jerky movement: The cylinder may move unevenly or shake.
-
Overheating: High heat can show damage or dirty fluid.
To clean the cylinder, take off hose couplers or remove hoses. Move the cylinder in and out by hand to look for rust or dirt. Pour hydraulic oil into each port and move the cylinder by hand to flush it. You can use air pressure to move the cylinder, but always hold the rod and piston to stay safe.
Tip: Always wear gloves and eye protection when you work with hydraulic fluid or clean parts.
Install New Seals, Gland, or Barrel
Put in new seals and other parts with care. Follow these steps for good results:
-
Put oil on the new seals and place them right.
-
Lubricate inside the cylinder tube with hydraulic fluid.
-
Put the piston, rod, and other parts back in.
-
Put the cylinder back on your machine and connect the pipes.
-
Test the cylinder by using it and checking for leaks.
🛠️ Use only the right hydraulic fluid for oiling and testing.
Inspect for Leaks and Wear
After you change the seals, check the cylinder for leaks and wear. Use this table to help you look:
|
Inspection Aspect |
Details |
|---|---|
|
Signs of Wear |
Look for rod marks, seal leaks, or pits. |
|
Fluid Leakage |
Even small leaks can lower pressure over time. |
|
Misalignment |
Check for uneven wear on rods and seals. |
|
Mounting Hardware |
Look for loose or worn spots at mounting points. |
You should also check the hydraulic fluid for dirt or other stuff. Look at the filter for clogs or trash. Check the cylinder rods for damage or stress. Make sure all oiled spots have enough fluid. Do a piston-seal bypass test to see if the cylinder tube is ballooning.
Note: Checking often helps you find problems early and keeps your hydraulic system safe.
Test and Finalize
Bleed Air from System
After you reinstall a hydraulic cylinder, you need to bleed the system to remove trapped air. Air in the hydraulic lines can cause jerky movement and lower power. Follow these steps to bleed the air:
-
Locate the bleed valve on your hydraulic cylinder. You usually find it at the top or near the hose connections.
-
Make sure the system is off and the cylinder sits in the correct position.
-
Place a container under the valve. Open the valve slowly by turning it counterclockwise.
-
Watch for air bubbles in the fluid. Let the fluid flow until you see a steady stream with no bubbles.
-
Close the valve and refill the hydraulic fluid reservoir if needed.
-
Operate the system slowly to check for smooth movement.
Tip: Always use clean hydraulic fluid when you refill after you reinstall a hydraulic cylinder.
Test Operation and Check for Leaks
You must test the equipment after you reinstall a hydraulic cylinder. This step helps you find problems before they cause damage. When you test, look for these common issues:
-
Leaks: Check all connections and seals for fluid leaks.
-
Cylinder drift: Watch if the cylinder moves without input. This can mean a seal problem.
-
Uneven movement: Notice if the cylinder moves in a jerky or slow way.
-
Power loss: Make sure the cylinder gives the right force.
Use a pressure gauge to check system pressure. If you see leaks or drift, stop and fix them before using the machine again.
Note: Always test the equipment at low speed first after you reinstall a hydraulic cylinder.
Clean Up and Document Work
After you reinstall a hydraulic cylinder and finish testing, clean your work area. Wipe up any spilled fluid and remove used rags or parts. Good documentation helps you track maintenance and spot future problems. You should:
-
Record the date and details of the work.
-
Note the type and amount of hydraulic fluid used.
-
List any parts replaced, such as seals or hoses.
-
Write down test results and any issues found.
Store spare cylinders in a clean, dry place. Check fluid levels and seals every month. Plan regular inspections every few months to keep your hydraulic system safe.
"With a thorough diagnosis in hand, weigh the extent of the damage against the cost and benefits of repairing versus replacing the cylinder: Minor Repairs may be best for small issues, while Component Replacement is necessary for severe damage."
By following these steps each time you reinstall a hydraulic cylinder, you help your equipment last longer and work safely.
You keep yourself and your equipment safe by following each step. Checking your hydraulic cylinder often helps you find leaks early. This keeps your system working well. Always use the right tools and wear safety gear. This helps you avoid getting hurt or making expensive mistakes. Write down your maintenance work in a log. Call an expert if you see fluid leaking, slow movement, or hear odd sounds. Use this schedule to check your cylinder:
|
Frequency |
Inspection Tasks |
|---|---|
|
Daily |
Look for leaks, clean rods, listen for noises |
|
Weekly |
Check alignment, inspect rod and lubrication |
|
Monthly |
Clean thoroughly, inspect seals and hoses |